Some easy projects have been provided, but many experienced quilters will be able to look closely at the quilts and work out how most of them are made.
Size
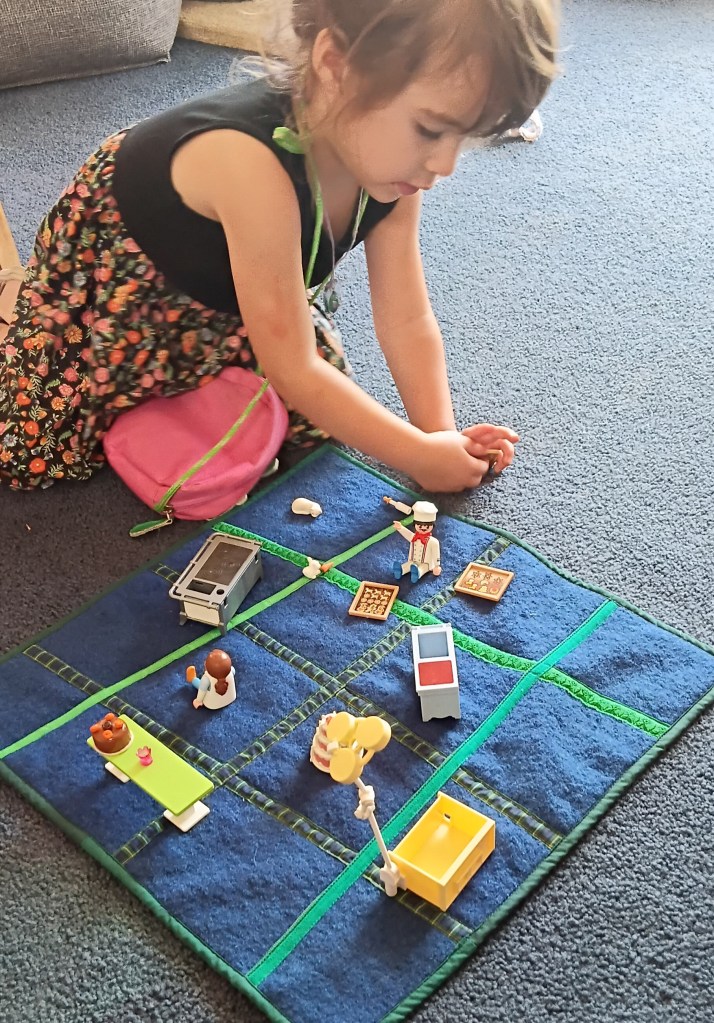
- The smaller quilts are ideal for individual use and the larger ones for a group of 2-4 children sitting around a table or on the floor. Don’t worry if your sizes don’t match mine, no one is measuring them.
- The finished sizes used in all of these projects are:
- 35 x 45cm (cut all layers 36x 46cm)
- 45 x 45cm (cut all layers 46 x 46cm)
- If you wish to make smaller quilts go ahead – there will be some children who would love a small version, eg 20-30cm square.
Hand or machine sewing
- I machine sew everything but you should choose the techniques most comfortable for you
- Whatever the techniques, the quilts need to be robust enough to survive being washed in “home corner” and/or being piled high with dinosaurs and other toys.
Materials for front
- Anything and everything, but must be washable.
- These quilts have all been created from off-cuts, op shop finds and donated pieces.
- When using soft/puffy fabrics such as polar fleece on the front, it is helpful to use a sturdy fabric on the back, eg gabardine, furnishing fabric.
Interlining
- The interlining has two purposes. It makes the quilt more robust, and it provides “grip” between the front and back fabrics.
- Thin wadding is great but is relatively expensive. It is preferable not to use high loft wadding as the quilts need to be flat enough for children to place items on when playing.
- I use cotton flannelette most of the time because it gives some body but is not expensive. If you or your group are making a lot of quilts my tip is to purchase king-size, pale colour, good quality sheets when on sale – much cheaper than buying yardage.
Materials for back
- The back of the quilt is important – don’t be surprised if a child likes the back more than the front, any connection is good.
- Polar fleece is used on the back of many quilts to ensure it is soft, has “body” and is stable to sew.
- Children love fur fabric, but I am not a fan of the mess it creates whilst sewing.
- I also use corduroy, velvet, wool (shrunk by washing in hot water beforehand to ensure it doesn’t shrink when washed later), thick furnishing fabrics.
- I often join 2-3 leftover pieces together for a back, sometimes with a seam, sometimes with a ribbon/tape covering the join.
Embellishments
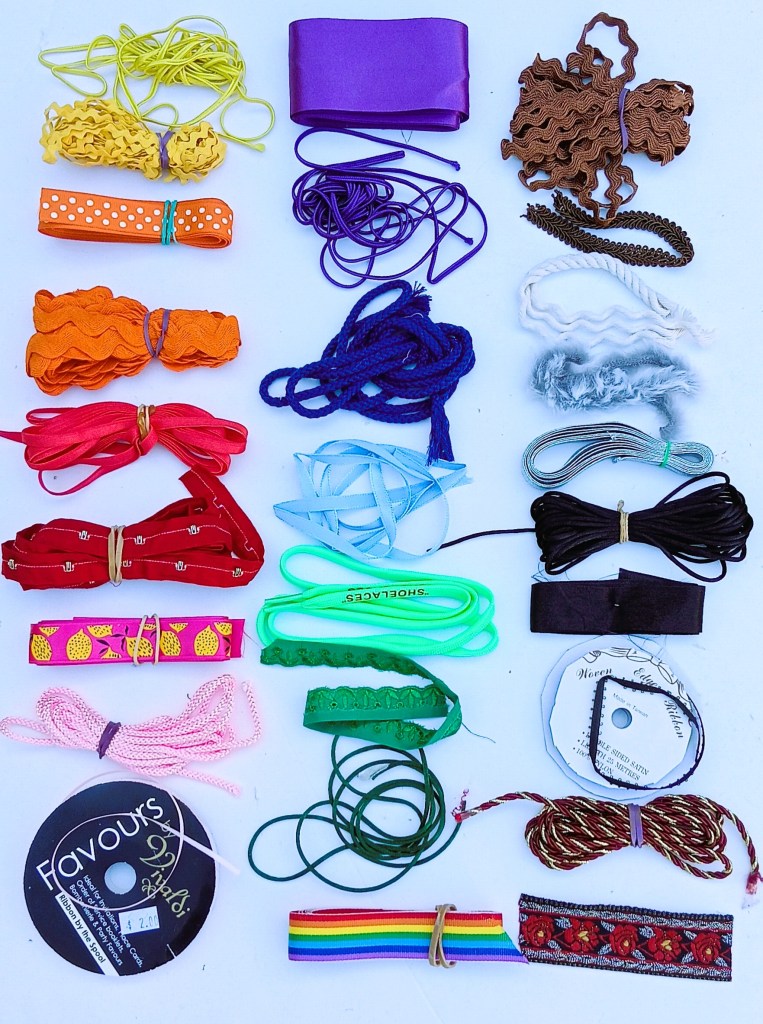
- Anything and everything but must be washable.
- Ribbons of all types eg satin, grosgrain, cotton, velvet, sparkly
- Miscellaneous – braid, cord, ric rac, zips (cut ends off to separate the two sides), Russia braid, broderie anglaise, coloured elastic, piping, thick yarn, straps, bias binding, shoelaces, plastic strips
- Leather, vinyl and felted wool shapes.
- Sticky-tape can be used to hold leather or vinyl in place until stitched.
- I have always sewn thinner leather and vinyl with a domestic sewing machine, treating them the same as thick fabric.
- If the leather or vinyl sticks to the foot while sewing, you can put sticky-tape, or tracing/greaseproof paper on top, stitch through all layers and tear tape/paper off.
- Appliqued shapes in any fabric, sewn with satin stitch.
- Buttons should be used very sparingly, and must be double sewn.
Plaited yarns
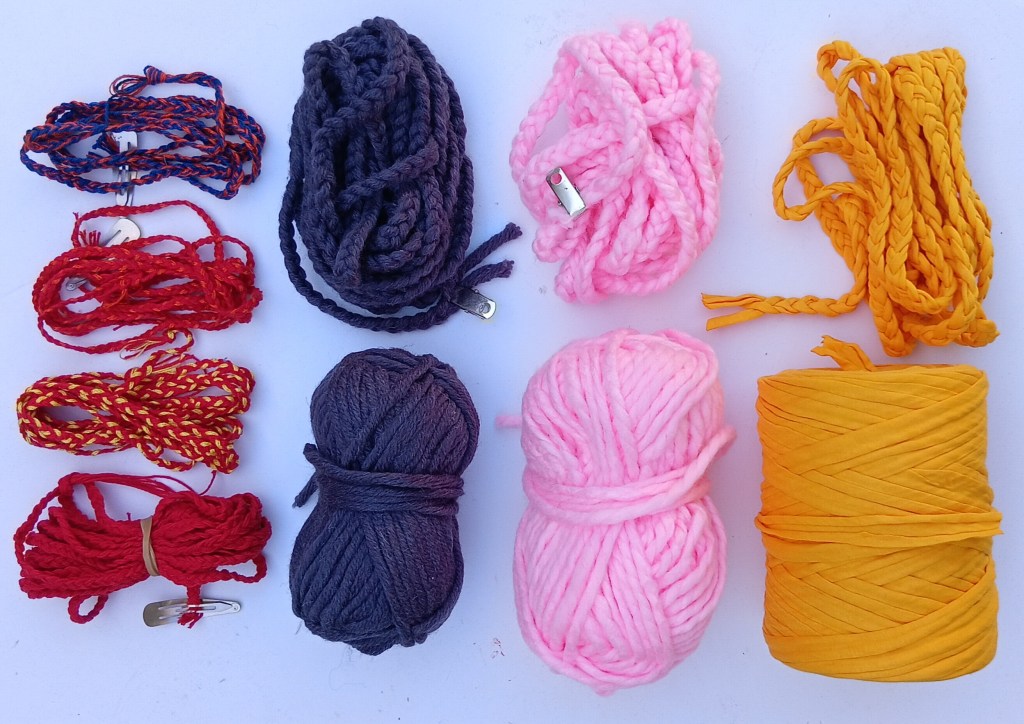
L-R: cotton crochet yarn, acrylic yarn (x2), cotton jersey knit binding tape
Plaited yarns are a great way to create thick, textural embellishments, and to convert cheap/thin yarns to have enough structure to stitch in place with 2-3 lines of stitching.
- Cotton crochet yarn left overs can be plaited with multiple strands (ie 3×3, 3×4, 3×5) to give interesting colours and structures of different widths. It is much more affordable than ric rac, braids, good quality ribbons.
- Jersey knit binding tape was a great find, $5 for a 100m spool at the op shop. Balls of yarn usually $1.
Quilting
Although some quilting is needed to hold the layers together, it can be fairly minimal. Also the stitched embellishments add more quilting lines as I do them through all thee layers at the end.
Squaring up
I recommend you cut all the fronts, backs and linings 5mm bigger all round, to allow for trimming after the layers are quilted. Pin then stay stitch the edges together prior to trimming (I use up any any unwanted threads for this as it will be covered by the binding).
Bindings
- I use a lot of leftovers for bindings, often piecing shorter lengths together to create an interesting edge.
- I choose to cut on the straight grain so as not to waste fabric, and because I find it much easier to sew.
- Polyester and rayon fabrics which are a bit light for the front, can be used up for bindings.
