
DESCRIPTION
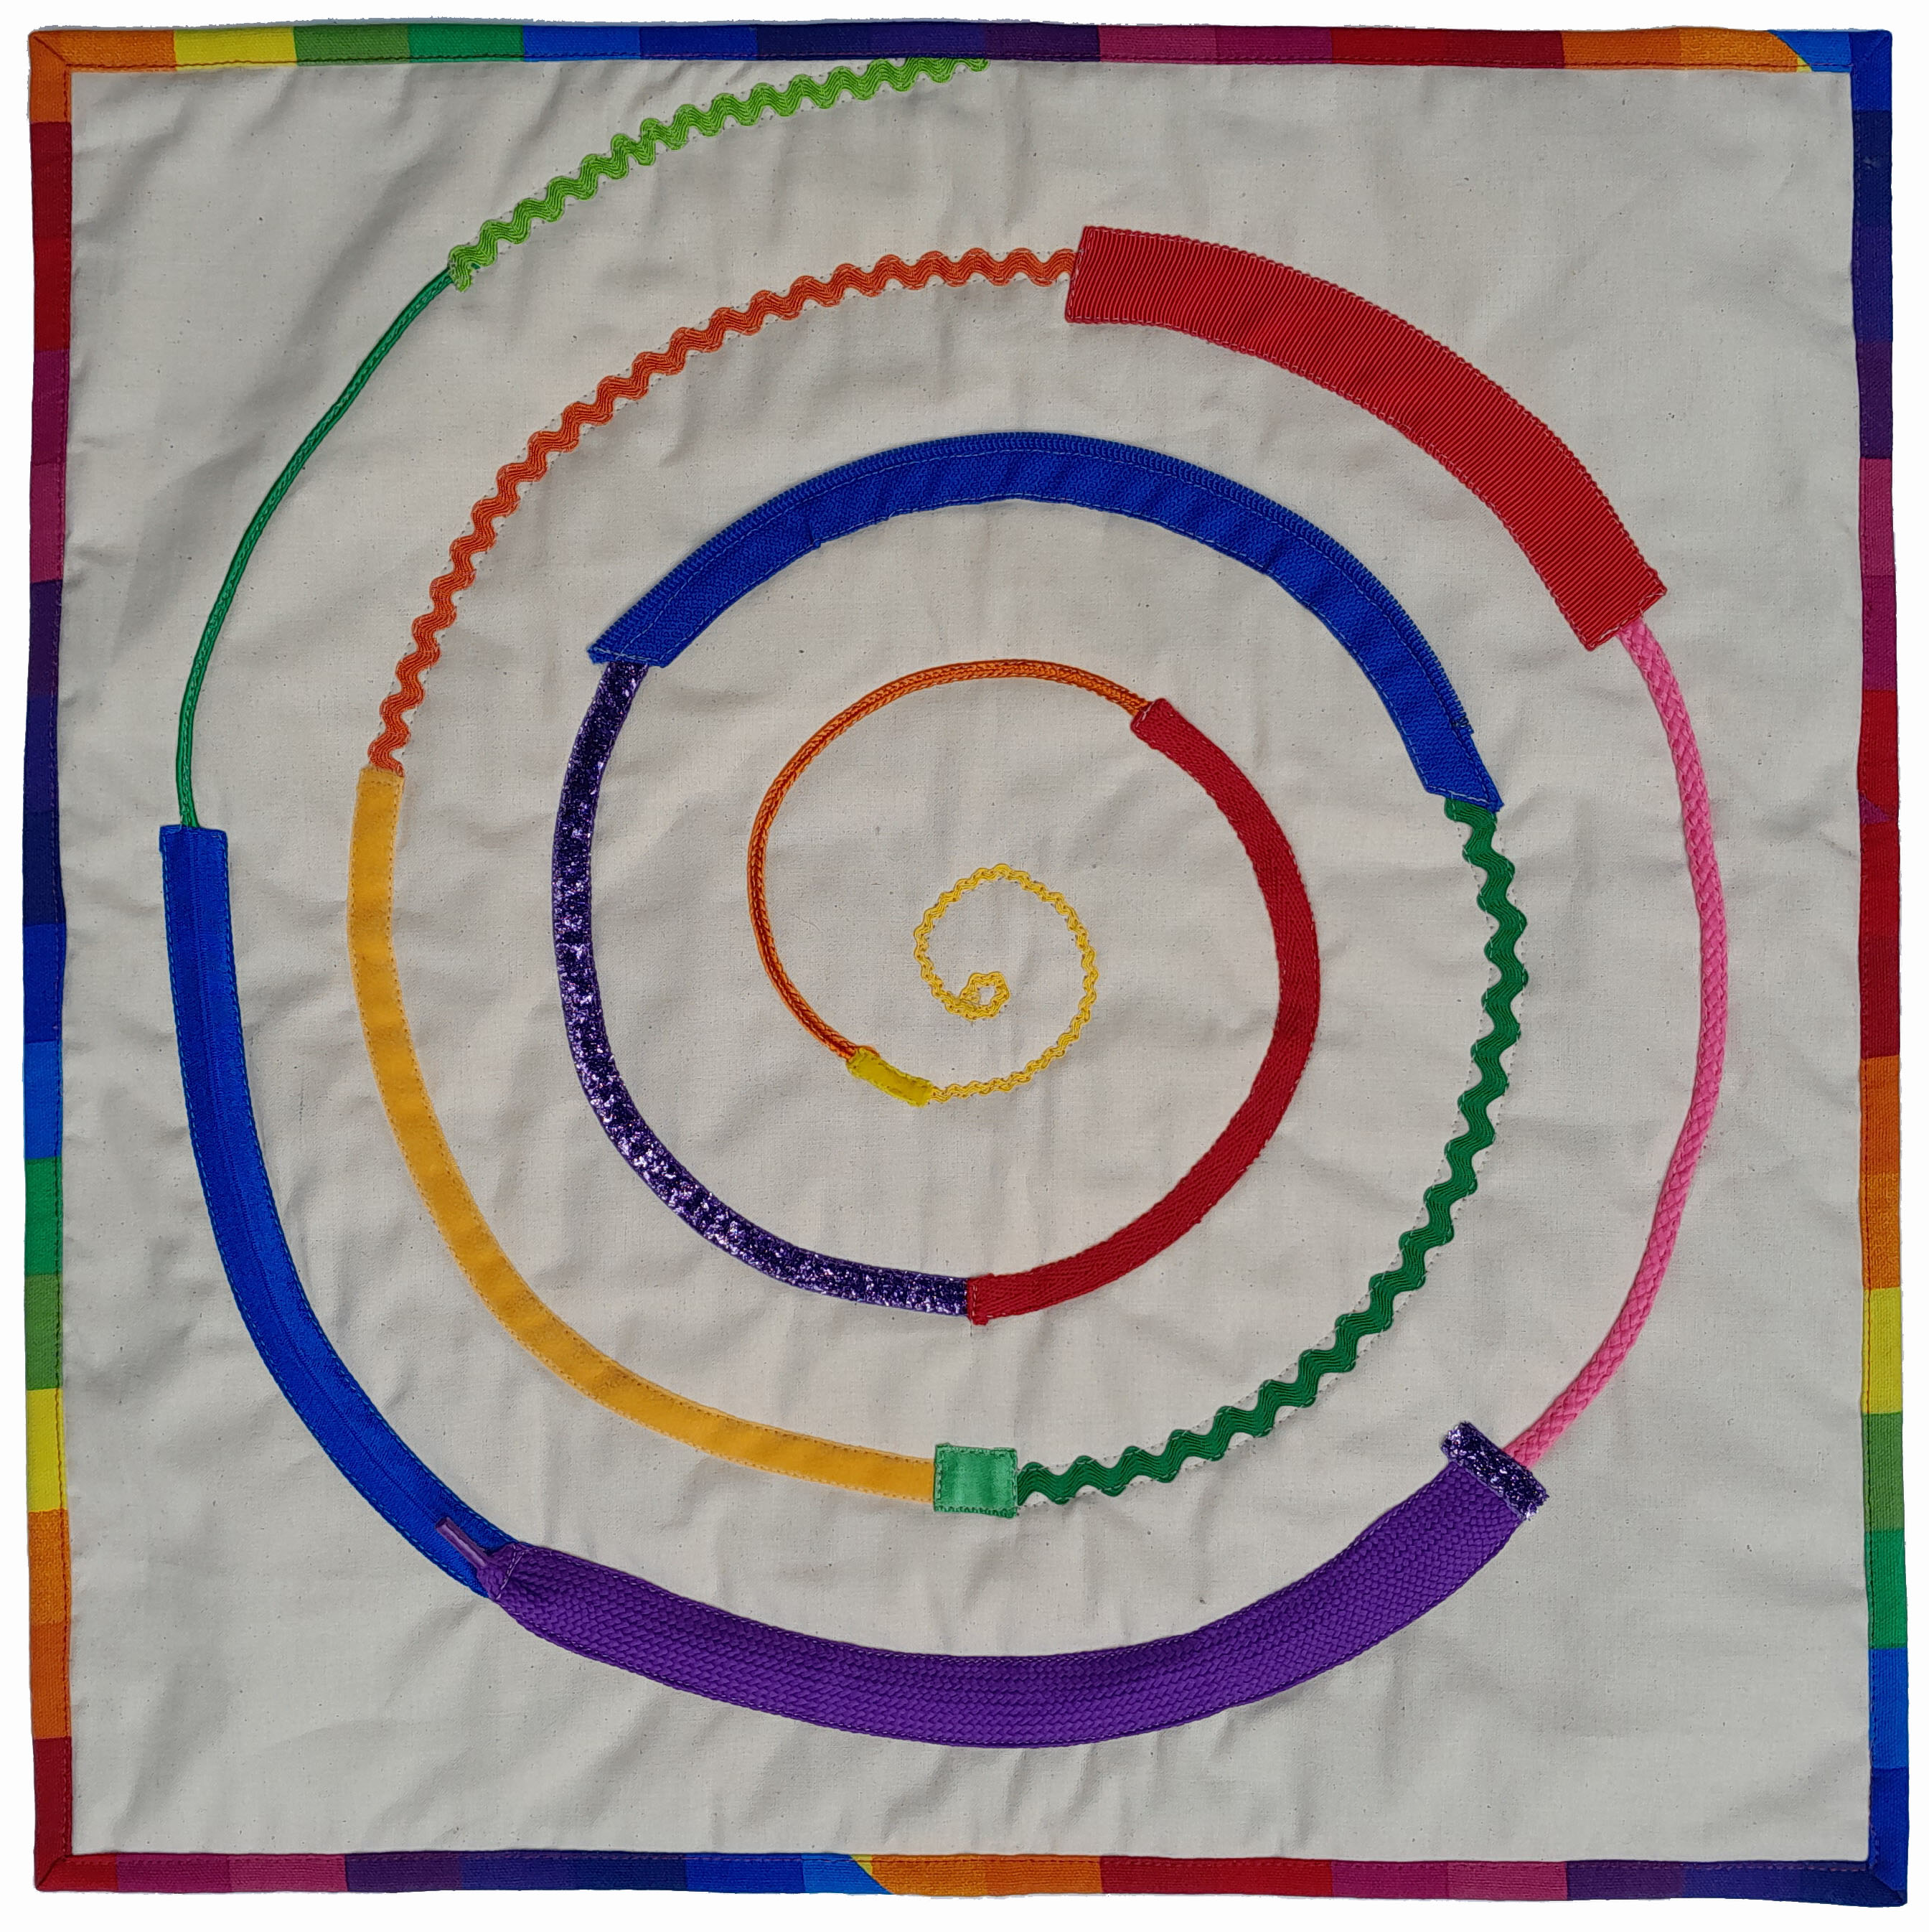
Round & round the garden like a teddy bear … or a dinosaur … or a train … or a …? There are 15-20 different colours and textures in these quilts, which are designed to provide a foundation for creative activities by a group of children working at a table or on the floor.
PLEASE REFER TO THE TECHNICAL INFORMATION BEFORE COMMENCING
Size
Approximately 45cm x 45cm (all layers cut 47 x 47cm)
Materials
- Light coloured fabrics on top so colours & textures stand out
- Fabric of choice on back
- Thin wadding if needed
- 15—25cm lengths of a wide variety of ribbons, braids, cords, ric rac, zips, shoelaces, Russia braid, coloured elastic,- in other words anything and everything.
ORDER OF ASSEMBLY
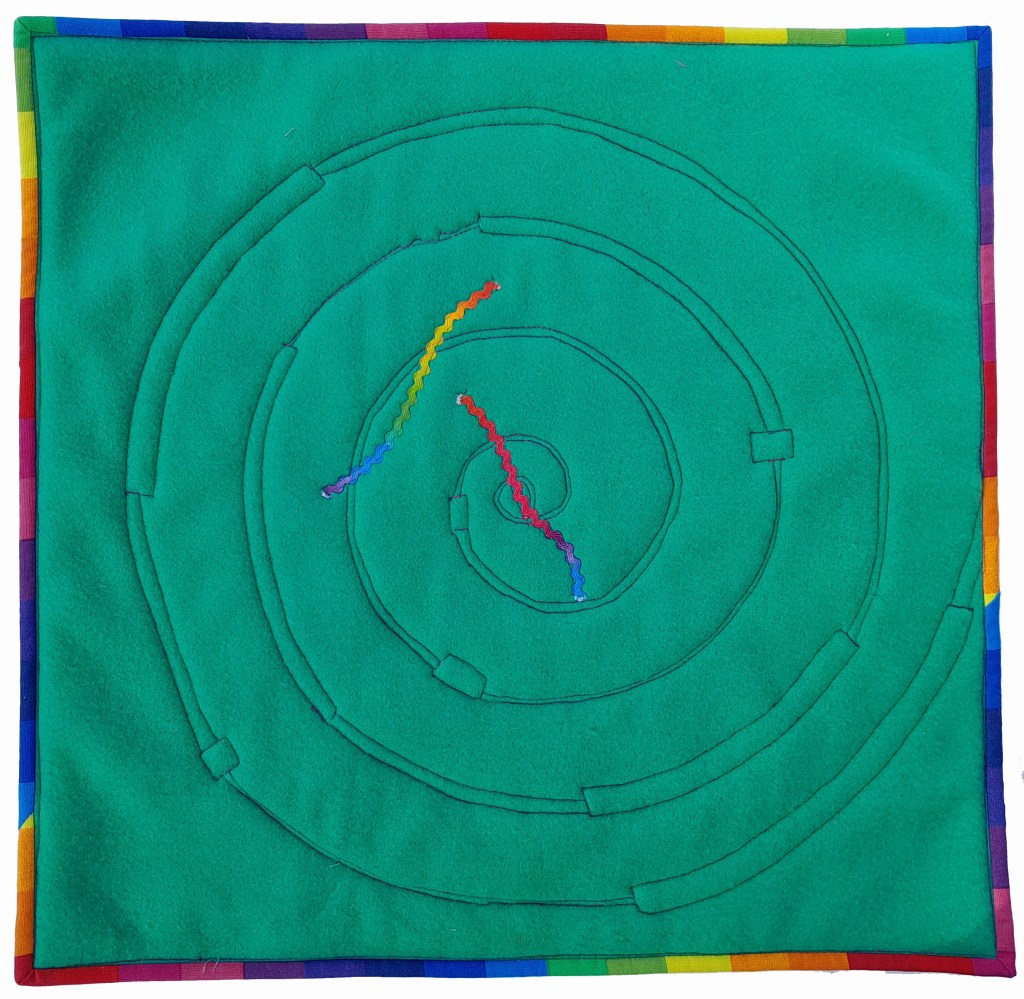
- Use a pencil to draw a spiral on the cloth, as per diagram. Such a diagram can be found on the internet and printed.
- Alternatively, create a pattern by drawing concentric circles 5cm apart (indicated by the dotted red lines) then drawing connecting lines (see diagram below). Note that sections of the line remain in place on the pattern so that the diagram doesn’t open up into an unwieldy “snake”.
- Trace lightly onto the top fabric
- Assemble the 3 layers.
- Use fine ric rac to do the inner circle, then fine cor, elastic or ribbon for the next, to make it easier to get around the tight curves. Reserve wider ribbons for the outside rings. I find it easier to pin the circles through the 3 layers ready for quilting, then place the ribbon etc as I go.
- If the joins are awkward, eg the end of a cord not being fully covered by a thin ribbon, make a feature of it by using a piece of ribbon to cover the join.
- Trim and bind the quilt.


Leave a comment